Setting up the choke in BJJ
Setting up the choke in BJJ
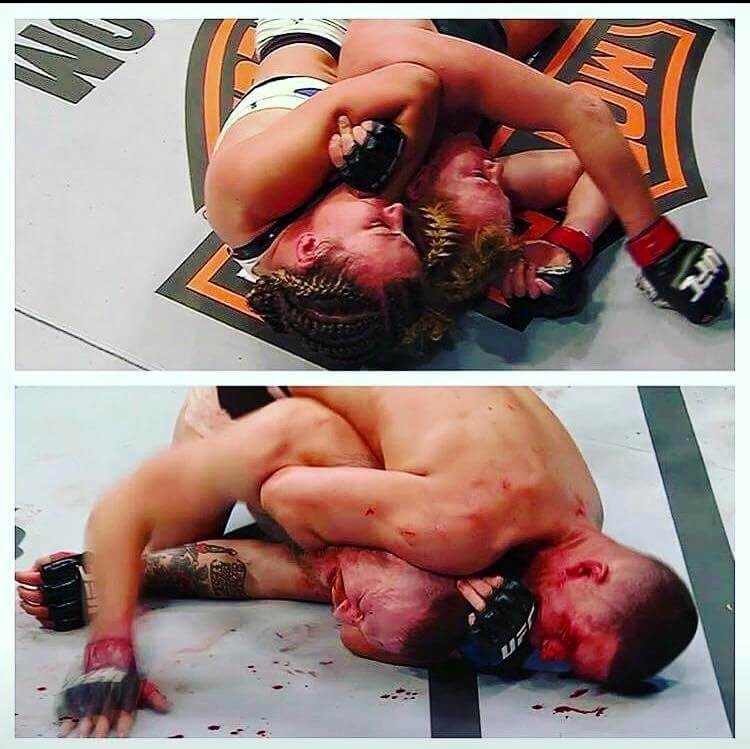
Here are some key details for setting up the choke in BJJ. At Savarese BJJ Academy (www.njbjj.com), we teach this approach to finished a choke. A big part of our approach to finishing is to get at least 50% of the choke set before you even connect your hands/arms to finish. Whenever you go to employ a rear naked choke without the gi, your two arms work in unison. One is the actual choke armthat encircles your opponent’s neck. The other is a support arm which solidifies and supports the strangle arm usually via figure four grip or palm to palm grip. Our contention is that your opponent should already be feeling the effects of the choke from just the one choke arm encircling the neck. Quite often, the one handed choke proves to be enough by itself and there is no need to lock hands/arms, we just finish one handed where the elbow goes behind the head. At championship level however, it is usually necessary to bring the support arm into play to create stronger pressure. Make sure that before you do, there is sufficient initial pressure from the choke arm that the addition of the support arm finishes the choke rather than initiates it. Failure to set the choke hand properly is rarely atoned for by the addition of the support arm. Develop the skill of sinking the choke arm first and then applying the support hand as a means of finishing a job already started by the choke arm rather than as the cause of the choke. Here you can see 2 example of chokes in high level MMA fights under pressure of being choked before they have even released the other hand. Finishing from here will be easy. There are other approaches to rear chokes (choking over the lower jaw, face or nose for example), but this is always the preferred method.

